90R electrode replacement guide
Over time, the 90R’s electrodes will become worn as they complete fusion. Worn electrodes will eventually start to under perform (see below), resulting in high splice loss.

Replacement schedule
We recommend replacing the electrodes on the 90R after 1,500 discharges. The 90R will start to warn you to replace the electrodes and you should follow the “Replace electrodes” procedure in the maintenance menu. This will walk you through the procedure and reset the electrode arc count to zero.
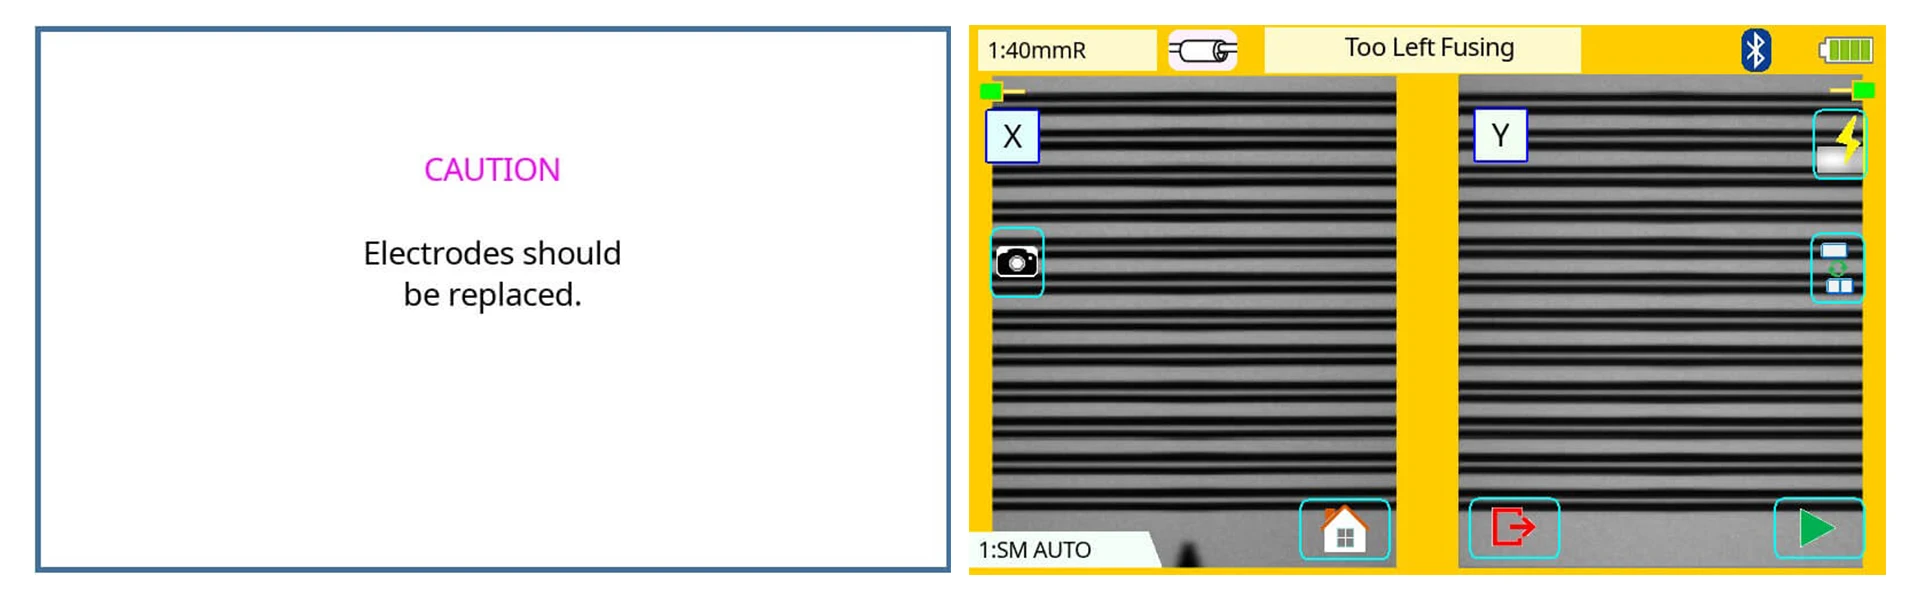
If you notice the fusing position moving from side to side unstably, or becoming dark or too bright during fusing, it’s time to replace your electrodes. New electrodes are also required if your 90R displays the ‘Too left/right’ error message on the monitor.
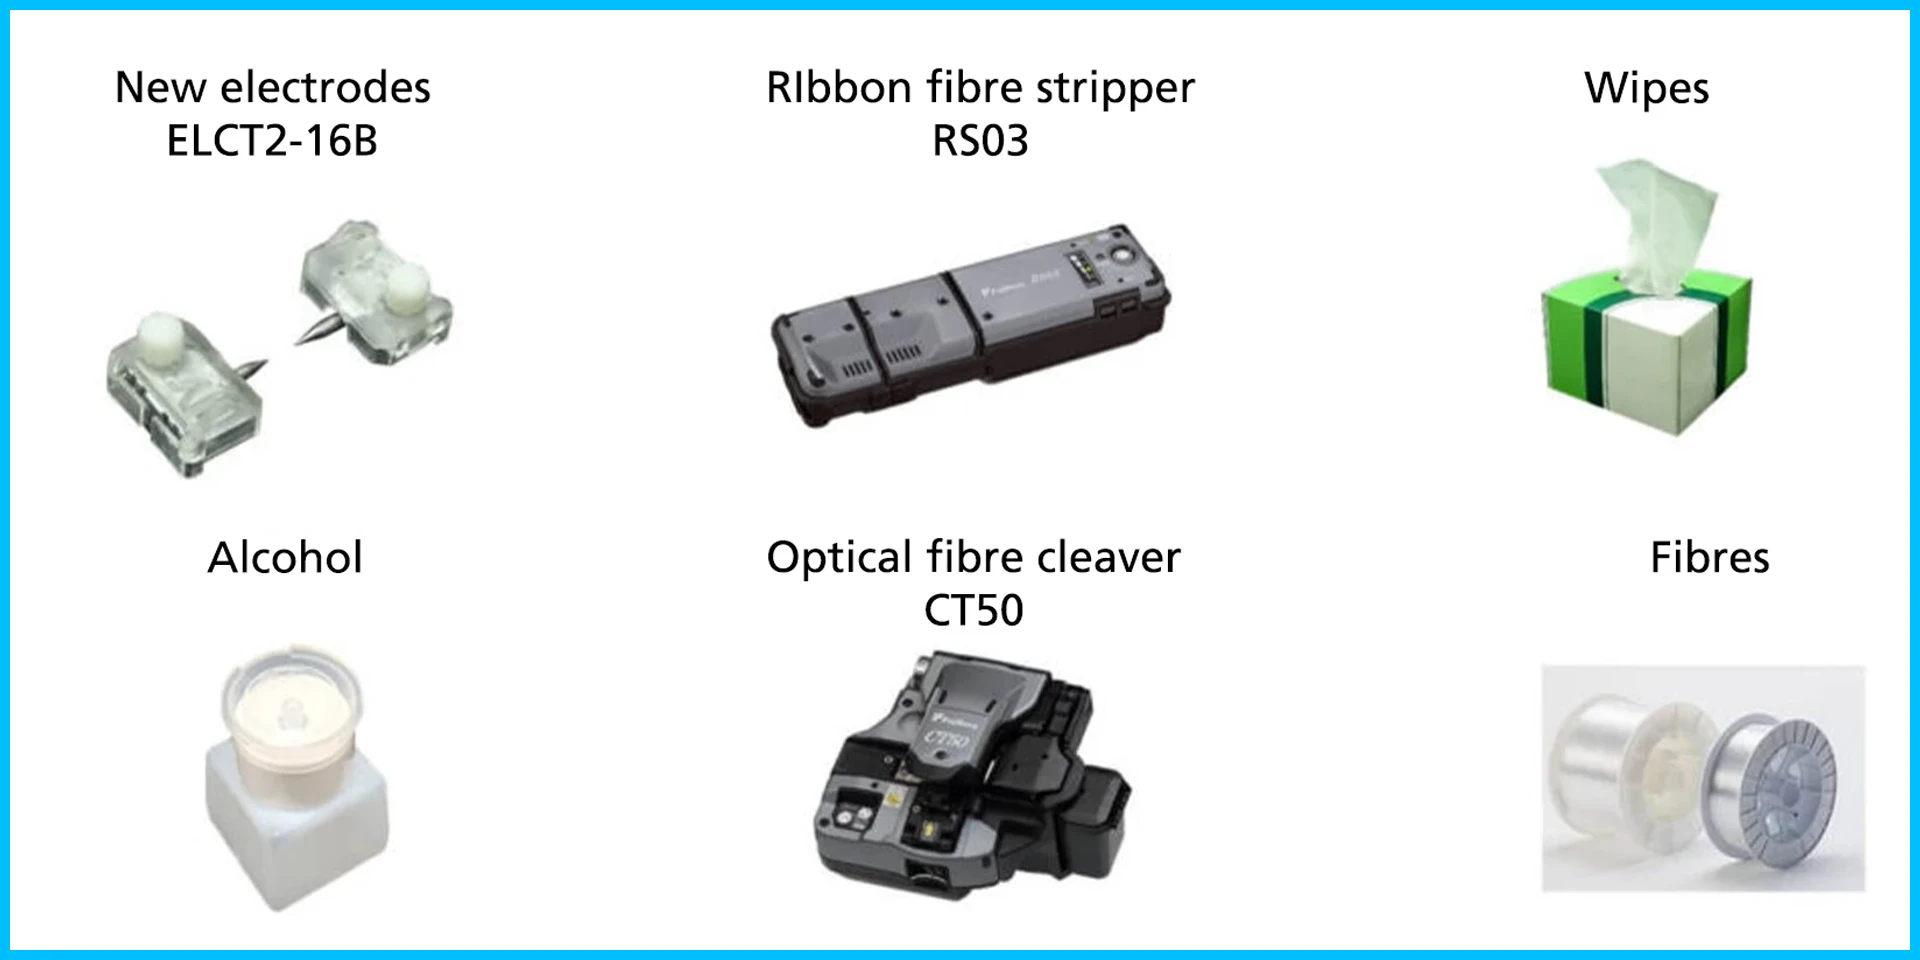
Parts required
Replacement procedure
1
Turn the splicer on.
2
– Press the Menu icon when the splicer is in Ready state.
– Press the Maintenance icon on the main menu.
– Then select Replace Electrodes from the maintenance menu.
3
Press OK on the box that appears on-screen to turn the splicer off. When completing this step do not press the power switch; doing so will turn the splicer off as normal without it going through the necessary electrode replacement procedure.
4
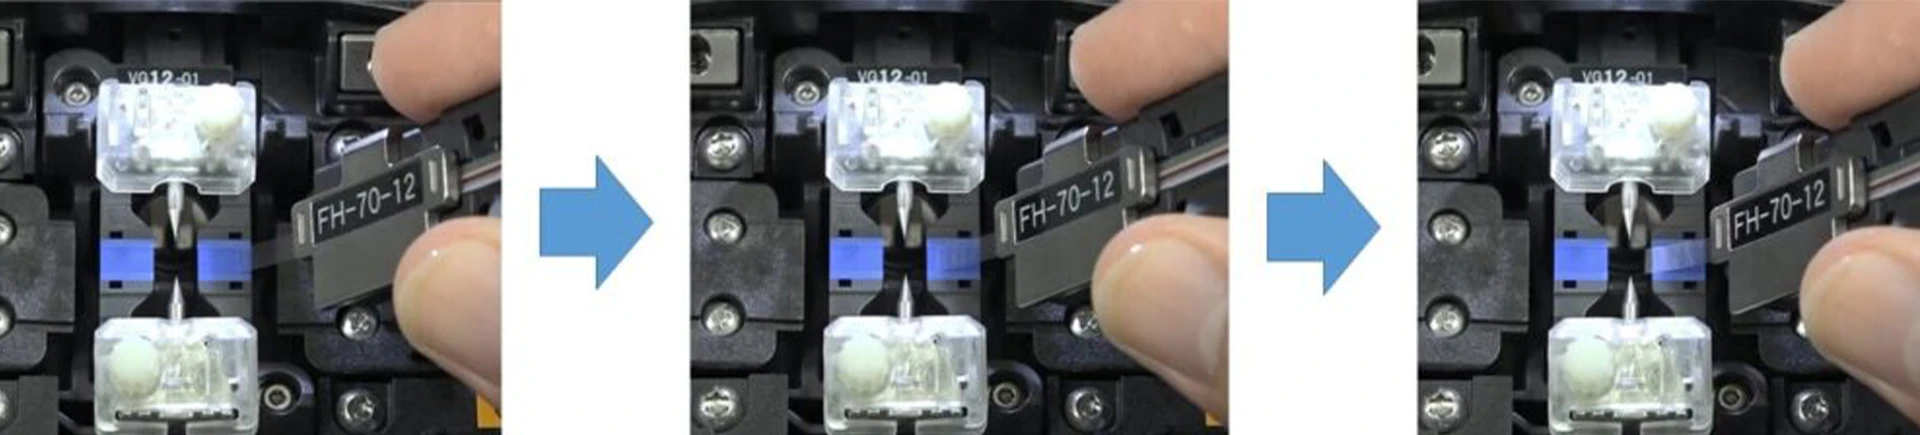
Open the wind protector by the hand, loosen the electrode fixture screws by finger and remove both electrodes from the splicer.
5
Attach the new electrodes and tighten the electrode fixture screws. Be careful not to hit any parts and bend the electrode tips. If the electrodes are not properly attached to the splicer, the tips of the electrode rods will shift. If the electrodes are not installed properly they will sit higher up than they should, so check that the electrodes are correctly seated in the splicer to insure proper installation.
6
Turn on the 90R. Once the power-on sequence is complete, the Stabilize Electrodes menu will appear on screen.
7
Perform electrodes stabilisation by setting fibres into the splicer and pressing the Start icon in the bottom right of the screen.
8
Perform power calibration by setting fibres into the splicer and press the Start in the bottom right of the screen.
9
Power calibration is complete and the new set of electrodes are installed and ready to use..
90R lens cleaning
A dirty objective lens/lenses will interfere with the 90R’s ability to observe the fibres, which will in turn cause errors and a high connection loss. Regularly cleaning the lenses to remove dirt is important for the performance of your splicer.
When to clean & how often
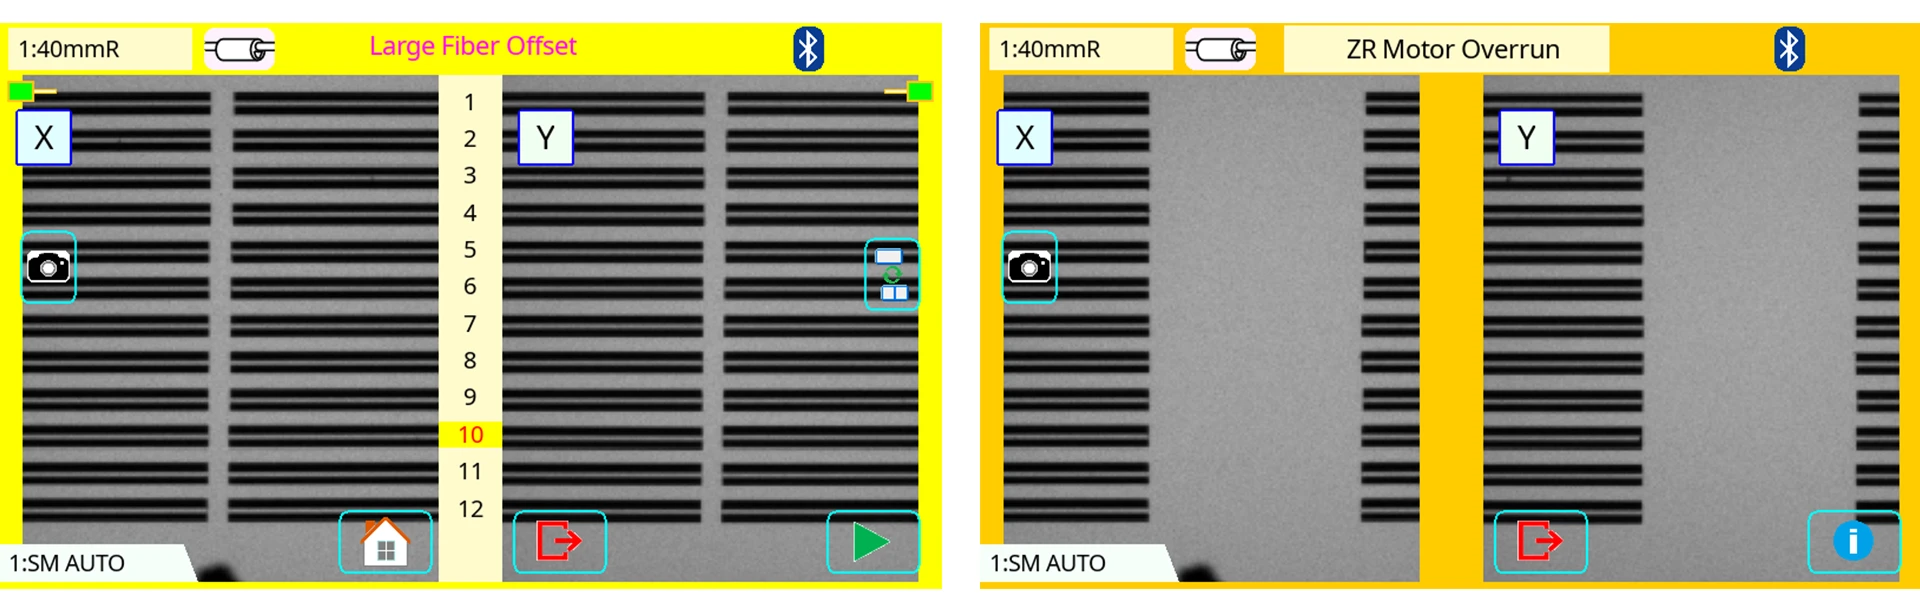
We recommend that the lenses are cleaned once a month as part of your splicer’s regular maintenance. You should also clean the lenses when you receive the following errors:
- R/L-Too Dusty Fibre
- X/Y-Dark Background
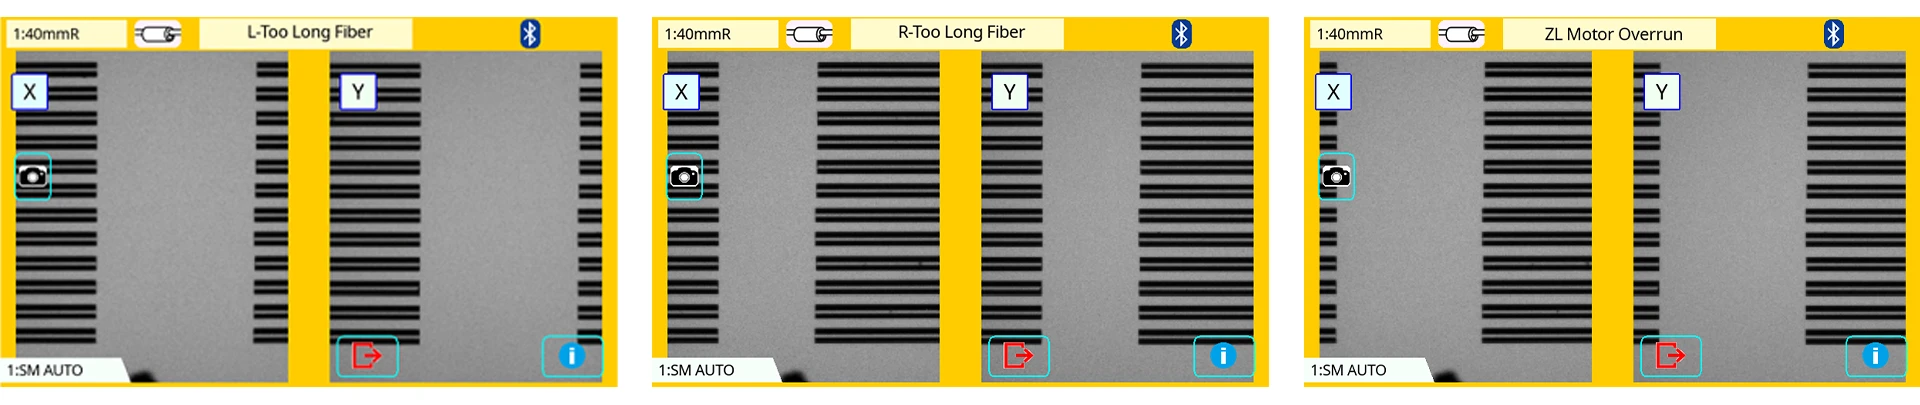
- R/L-Too Long Fibre
- ZL or ZR Motor Overrun
- L/R-Bad Fibre Position
- The Large Gap Offset or Large Cleave Angle errors occur when the gap difference cannot be set or inspected
Parts / tools required
Cotton swabs and alcohol with a purity of 99% or higher.
Procedure
1
Open the wind protector by the hand. Unscrew and remove the electrodes, being careful not to touch the electrode rod or the tip of the electrode rod.
How to clean the 90R’s V-grooves and fibre clamps
We recommend cleaning the V-groove and fibre clamps periodically because dust on either part could transfer to the fibre or influence to motion for splicing fibre, which result in high splice loss.
Timing and frequency
We recommend that you clean the V-grooves and clamps of your 90R every day. If you receive a large fibre offset error or the Zl/ZR motor overrun error, you should also clean the V-grooves and fibre clamp.
Tools/parts required

Procedure
1
Use a cotton swab soaked in alcohol to clean the V-grooves and fibre clamps.
2
If there is persistent dust in the V-grooves, you can used a cleaved piece of fibre to help remove the dust, as below.
How to replace the 90R’s V-grooves
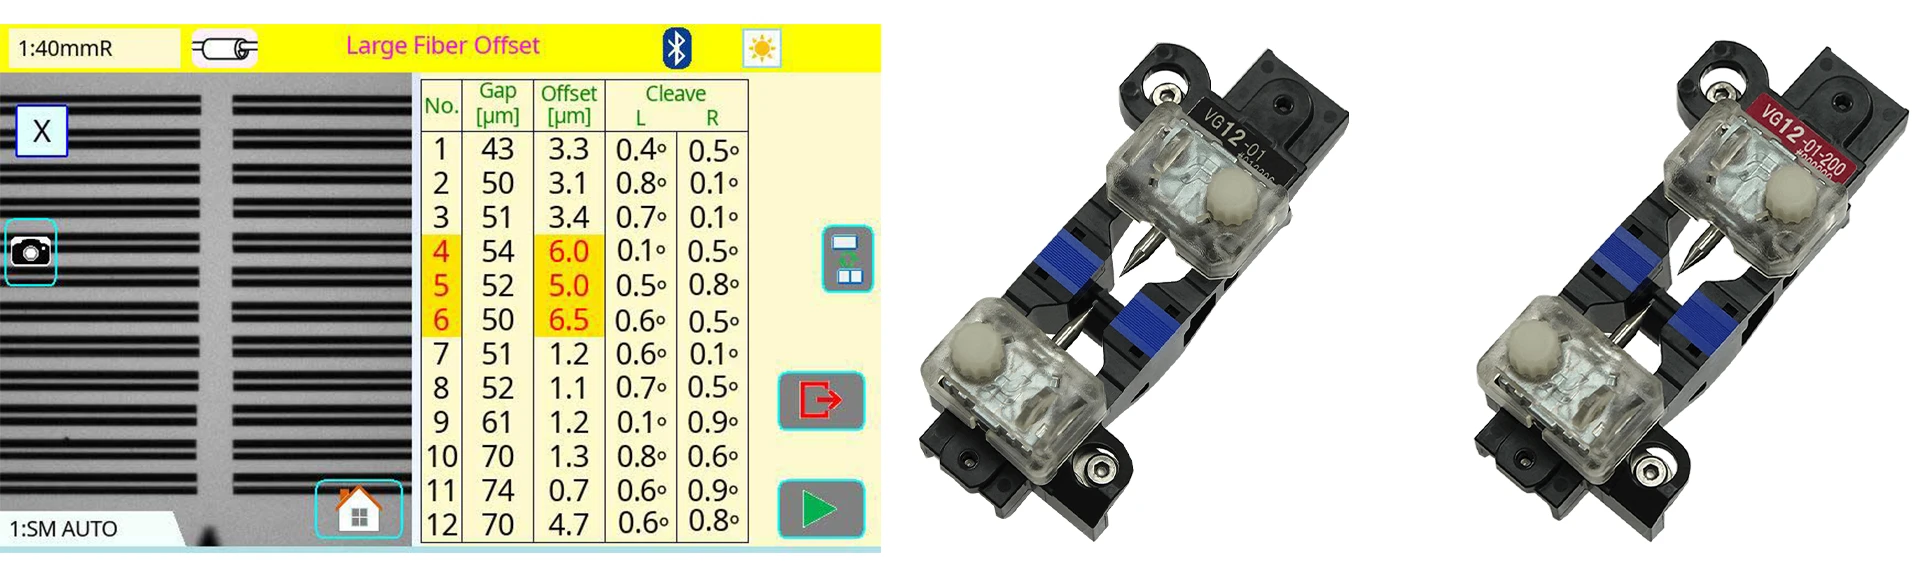
Replacing the 90R’s V-grooves is both a critical part of splicer maintenance and a decision which gives you flexibility to work with different fibres. The maintenance aspect is because the glass deposition by the discharge during fusion splicing adheres to the V-groove and electrode rod. Although the amount of adhered glass deposited per discharge is very small, it may still cause misalignment of the fibre axis (offsets) and affect the splicing loss with long-term use.
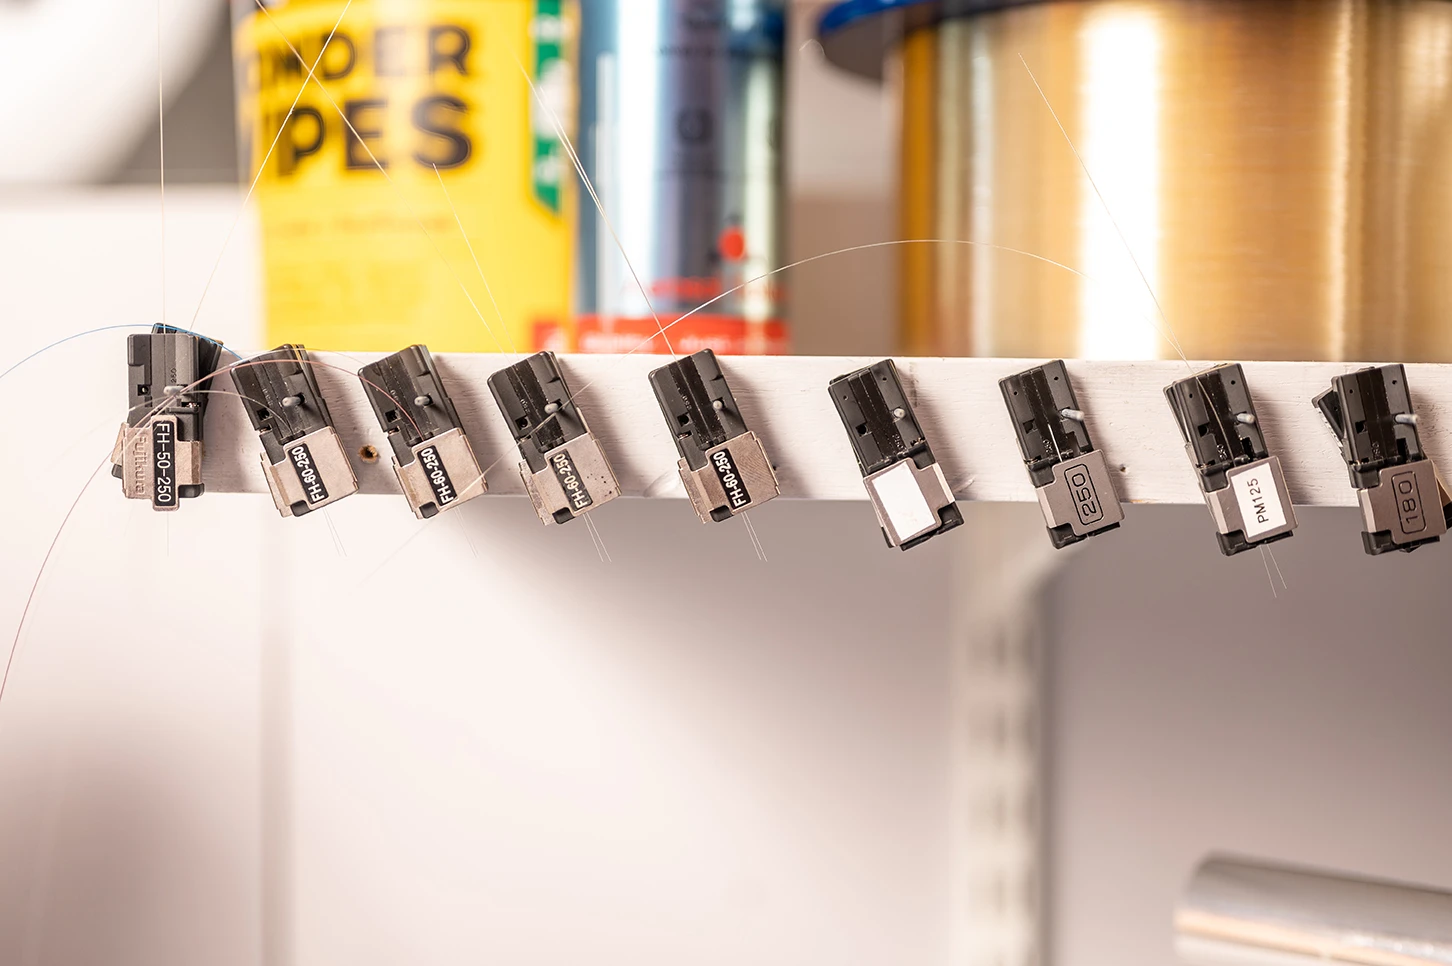
Different V-grooves provide different fibre spacing. In recent years, with increasing cable densities, 200µm coated / 200µm spaced fibres are becoming more popular.
Because the 90R uses a V-groove replacement method, it allows users to install and remove the V-groove with 200µm spacing for one with 250µm
When and how often to replace
The 90R Large Fibre Offset error can signify that it’s time to replace your V-grooves.
Parts / tools required
Replacement V-groove and a HEX-01 allen key.
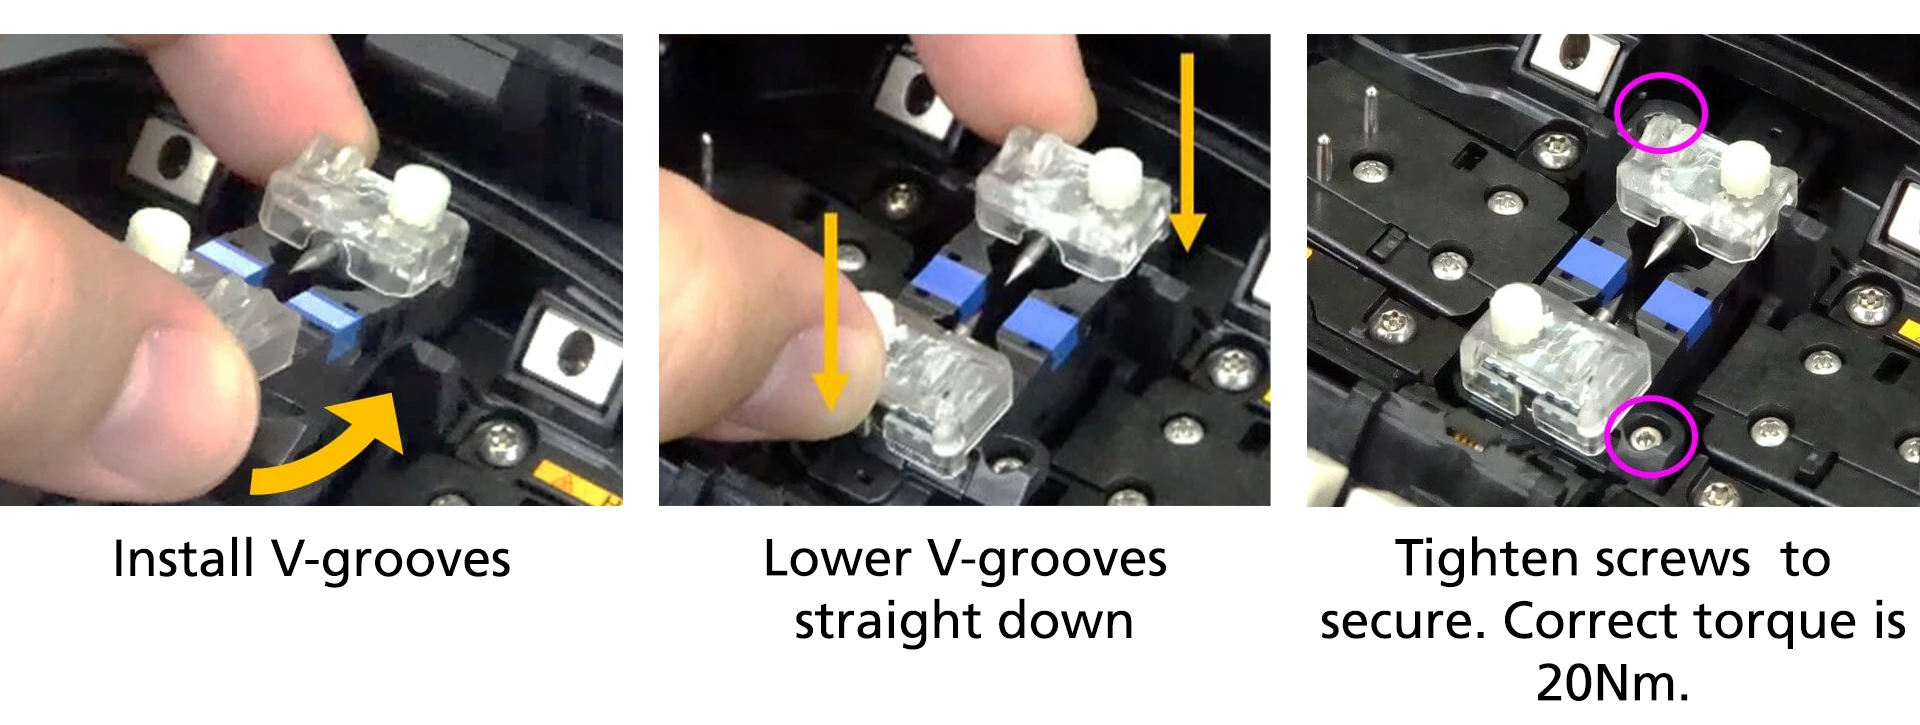
Procedure
1
Turn off the splicer.
2
Remove the V-groove.
3
Ensure the new V-groove is correctly placed – side A locates into the slot next to the heater, as show below.
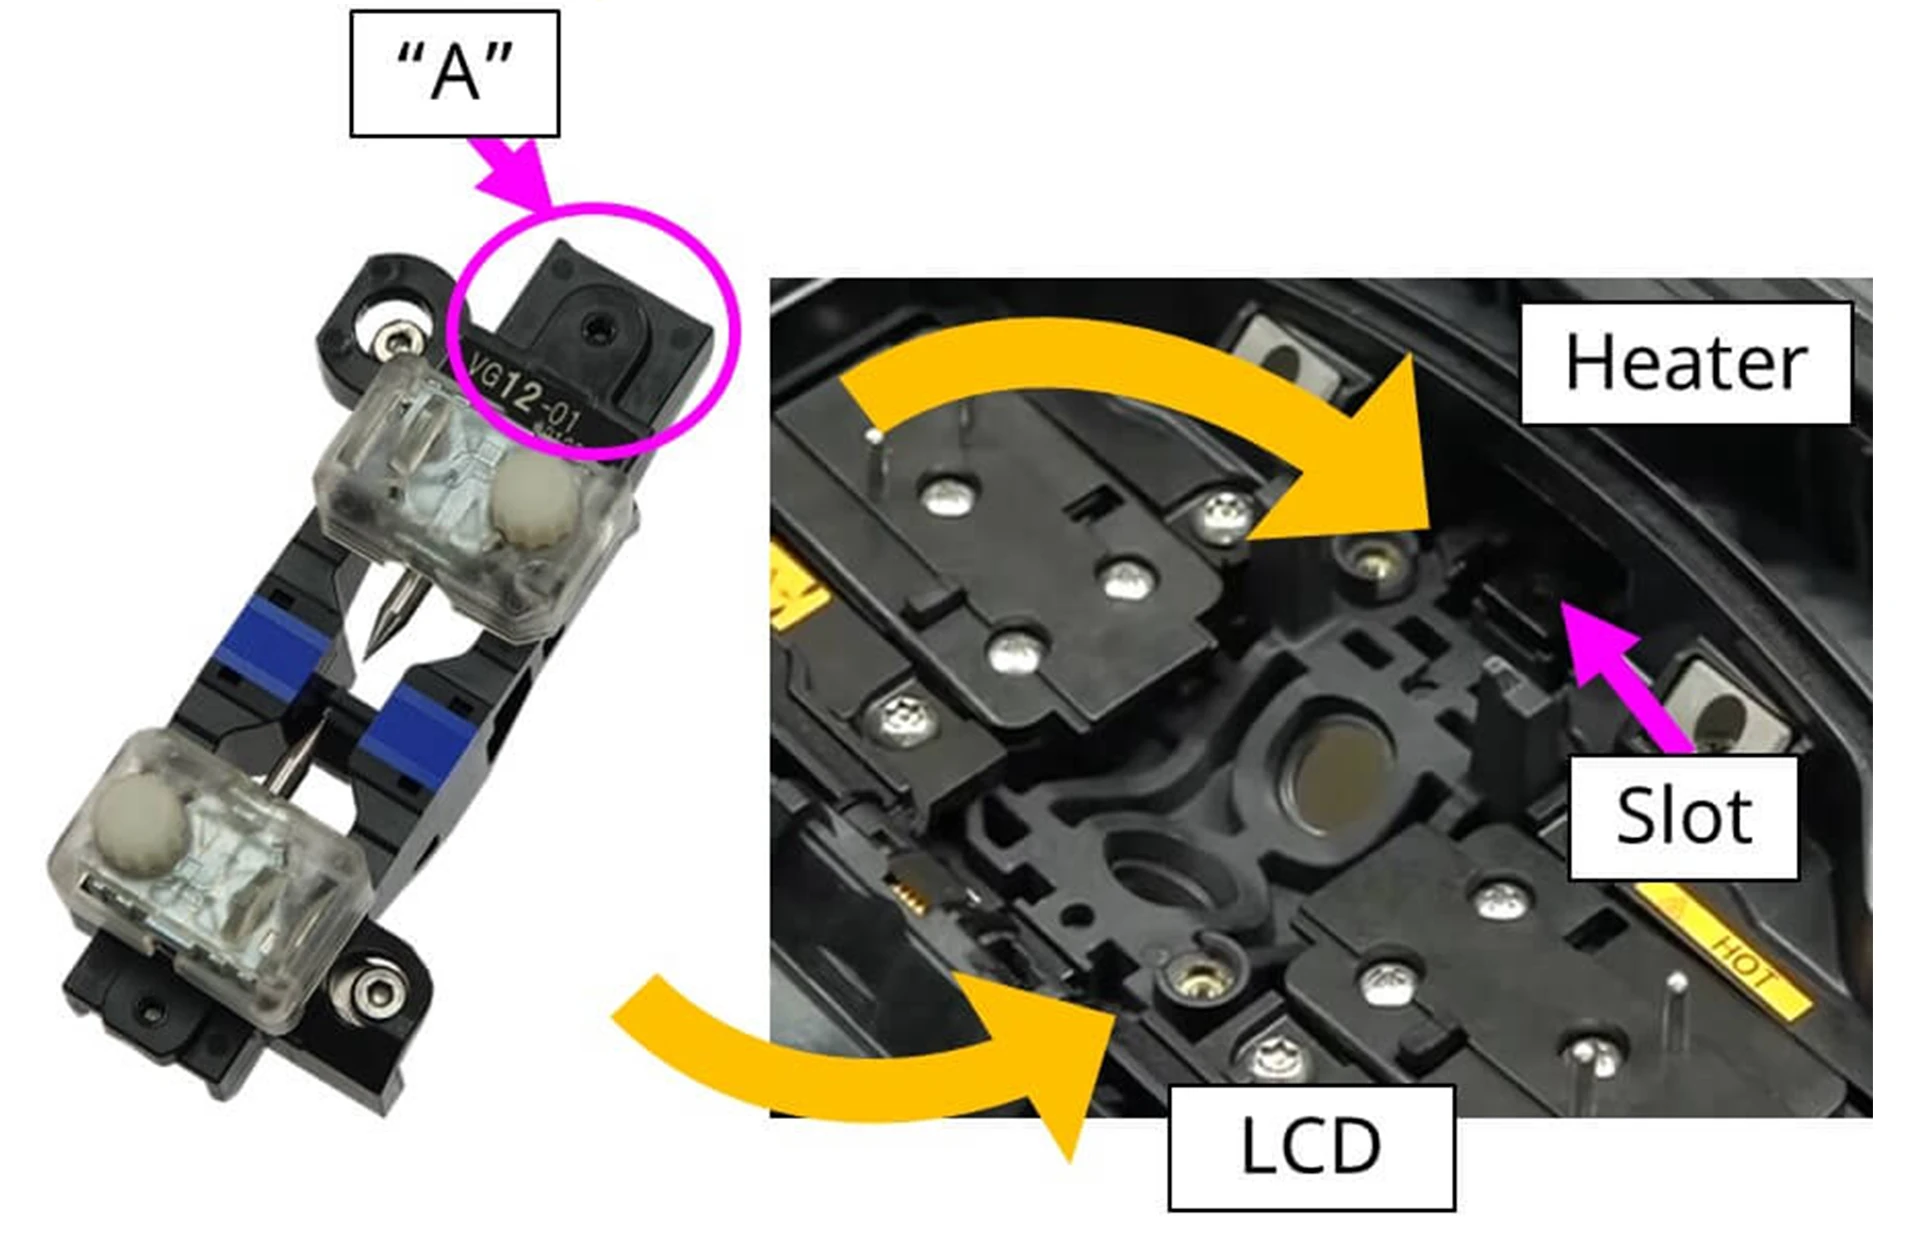
4
Install the new V-groove using the allen key.
5
After installing the V-groove, s select Clear Fusing Count from the Maintenance Menu and clear the number. The splicer remembers the fusing count for different spaced V-grooves, so when you fit a V-groove with different spacing it’s not necessary to clear the fusing count.
Fitting a new V-groove with the same spacing: It is necessary to clear the fusing count
Fitting a new V-groove with different spacing: It is not necessary to clear the fusing count